Is The DipStick Vape The Best Dab Vaporizer?

If you’re into concentrates, you probably own – or at least have tried – a few vape pens. They’re portable, easy to load and pretty stealthy. But after a while, you start to get that unpleasant burnt taste. And if you don’t have enough concentrate loaded, you get that dry wick taste, too – a double whammy.

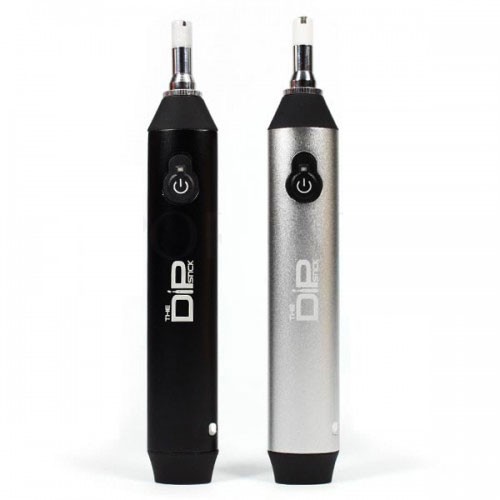
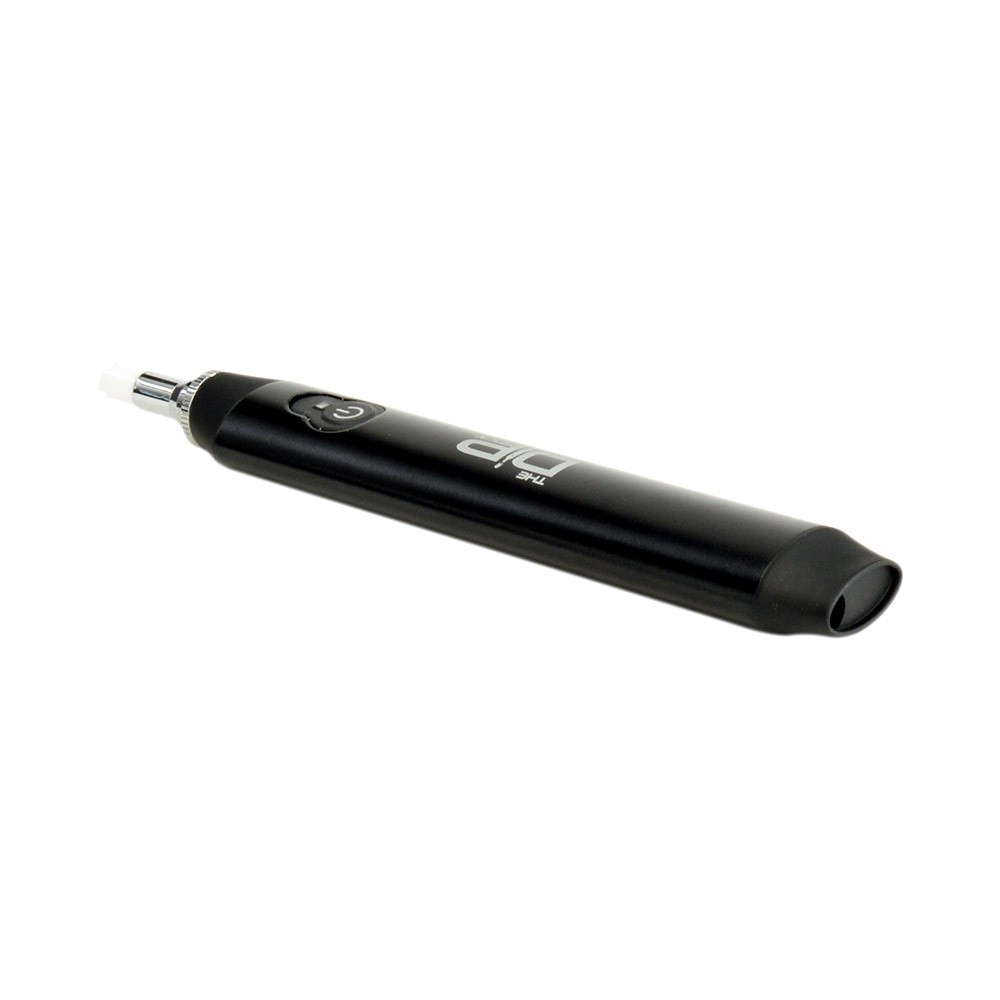
The DipStick Vape is different. It looks like a vape pen, but there’s no wick and you never actually load it up.

I know what you’re thinking: What? No loading and no wick? How can you vape without them?

Easy. We’ll show you how the DipStick works and weigh the pros and cons to see if this is the best dab vaporizer on the market.

How Does the DipStick Work?

dip stick vaporizerWith most portable vapes, there’s a lot to talk about when it comes to how the device works. But DipStick is so simple, there isn’t much to say.

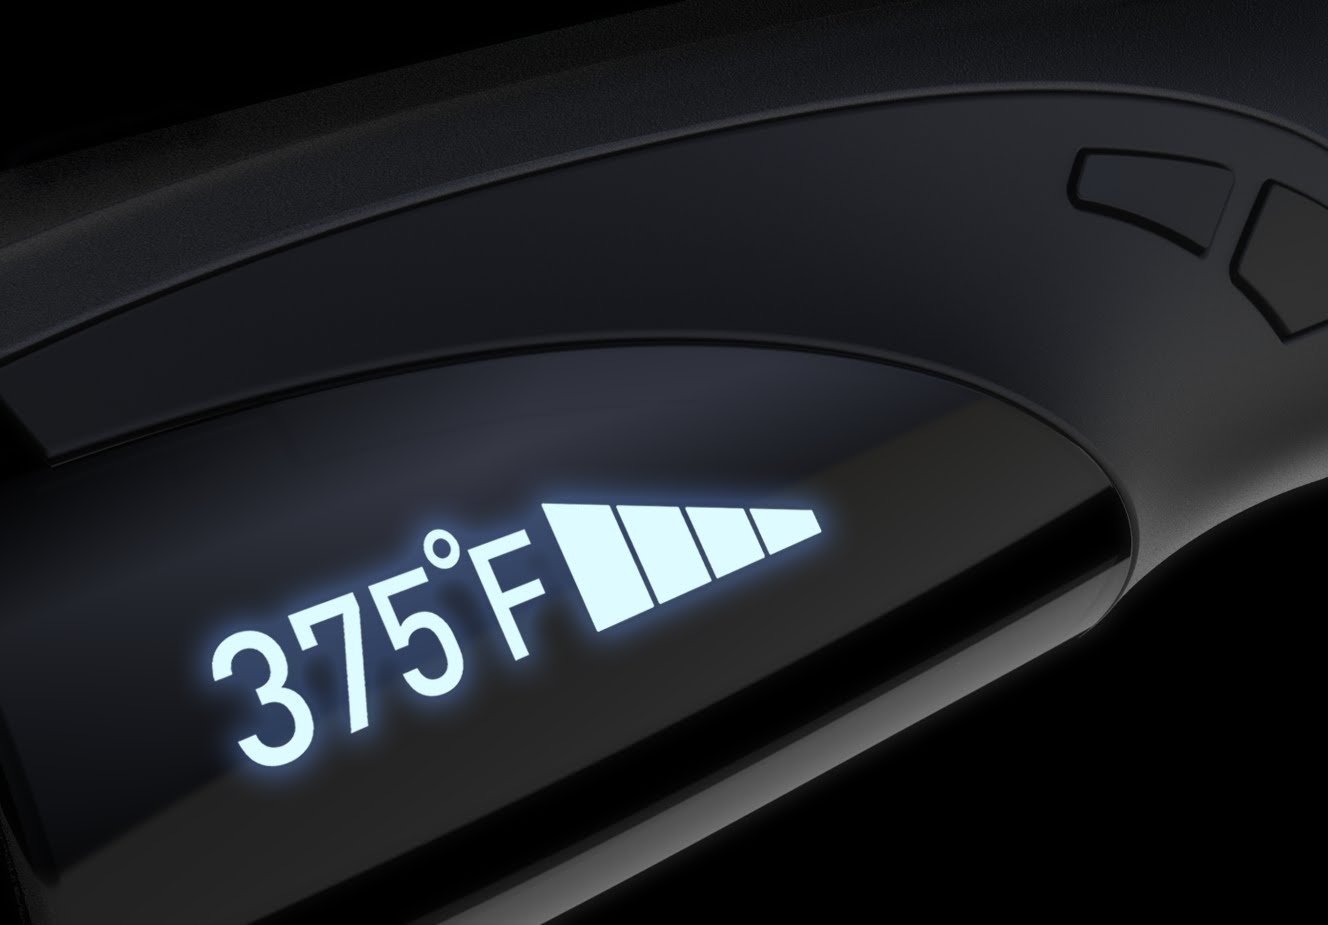
Here’s the gist of it:

  • Power up the device.
  • Wait until the temp turns red. The heat-up time is almost instant.

That’s it!

Because you’re just touching the vapor tip to the concentrate (you’re not actually loading up an oven), there’s no need for a wick – or a loading chamber for that matter.

When you’re done, there’s no product left behind, so you never get that burnt taste. All you get are clean hits every time. That’s something I’ve yet to find with other pens and vapes on the market.

Features and Specs – What Makes the DipStick Tick?

dipstick vaporizer blueYou know how this dab vaporizer works, but what other features does it offer? What makes it different from the competition?

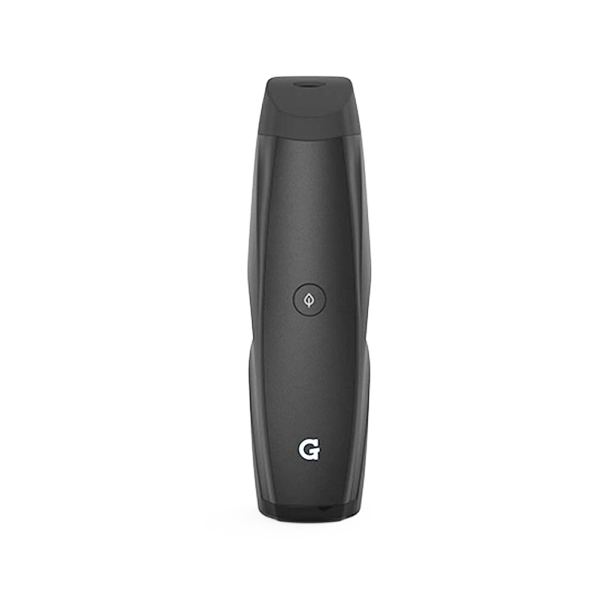
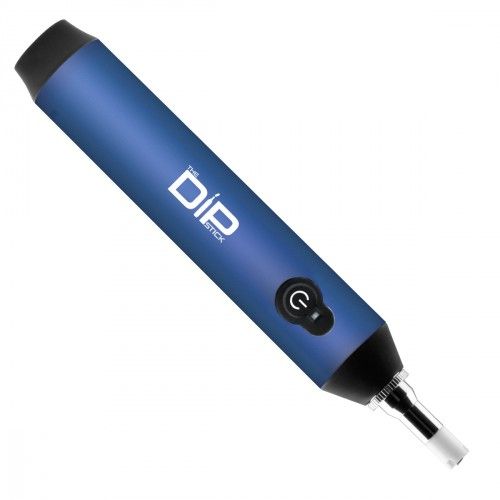
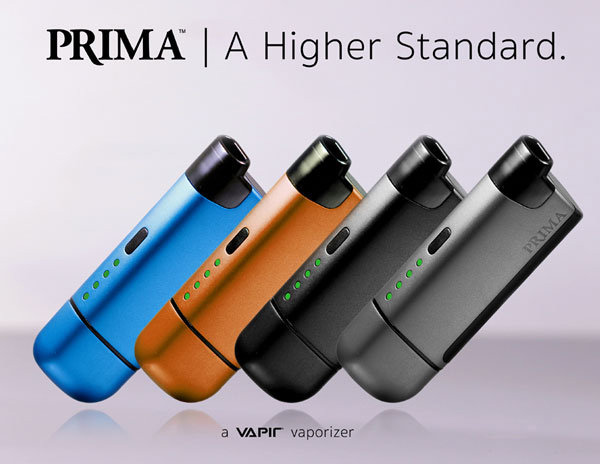
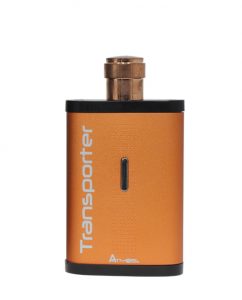
Compact Design & Colorful

I’ll be the first to admit that the DipStick isn’t the most compact vaporizer out there. Still, it’s compact enough for easy portability. It can easily fit in your pocket, purse or glove box.

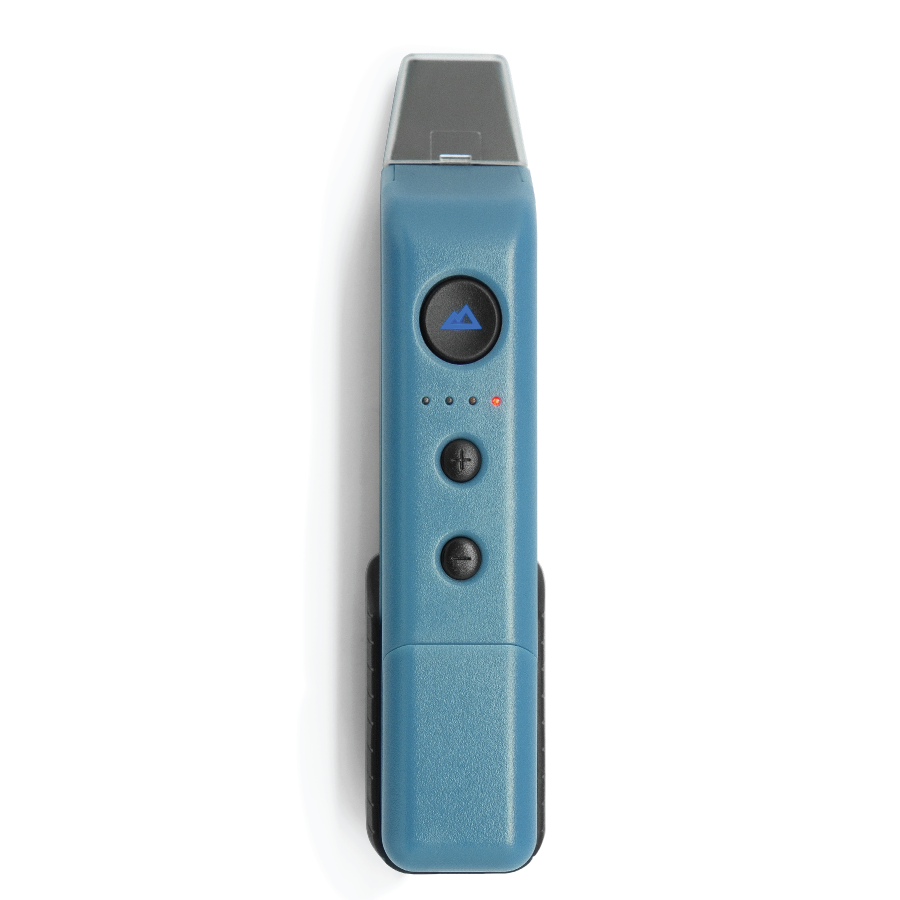
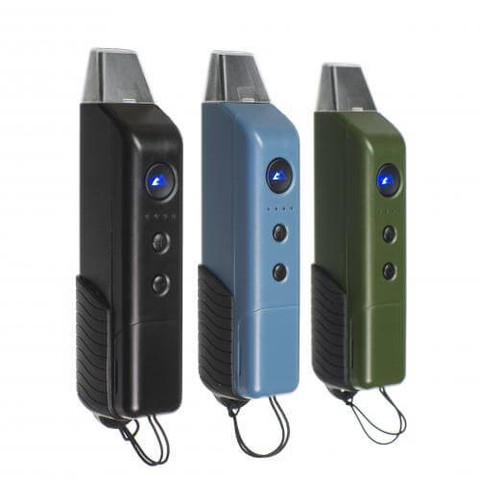
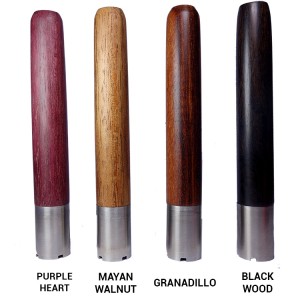
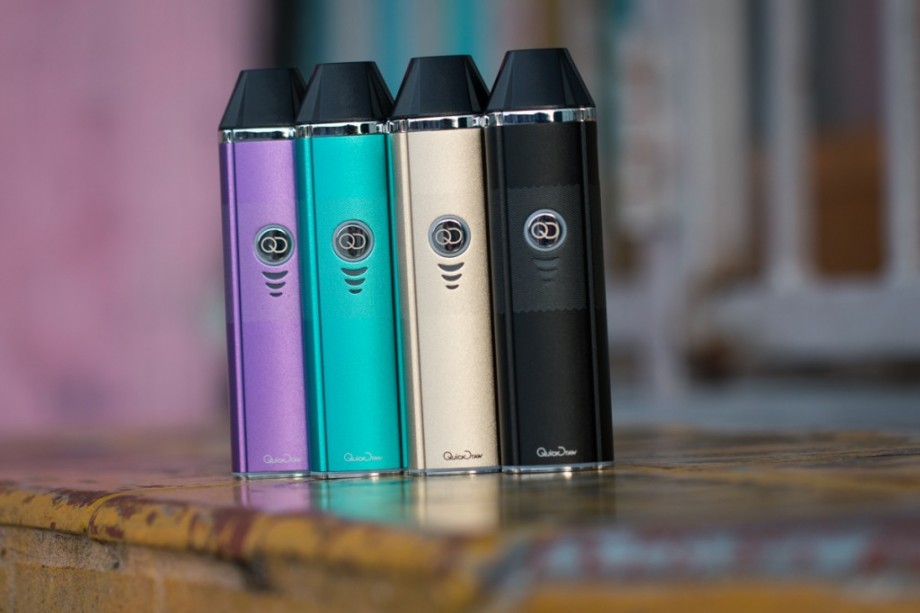
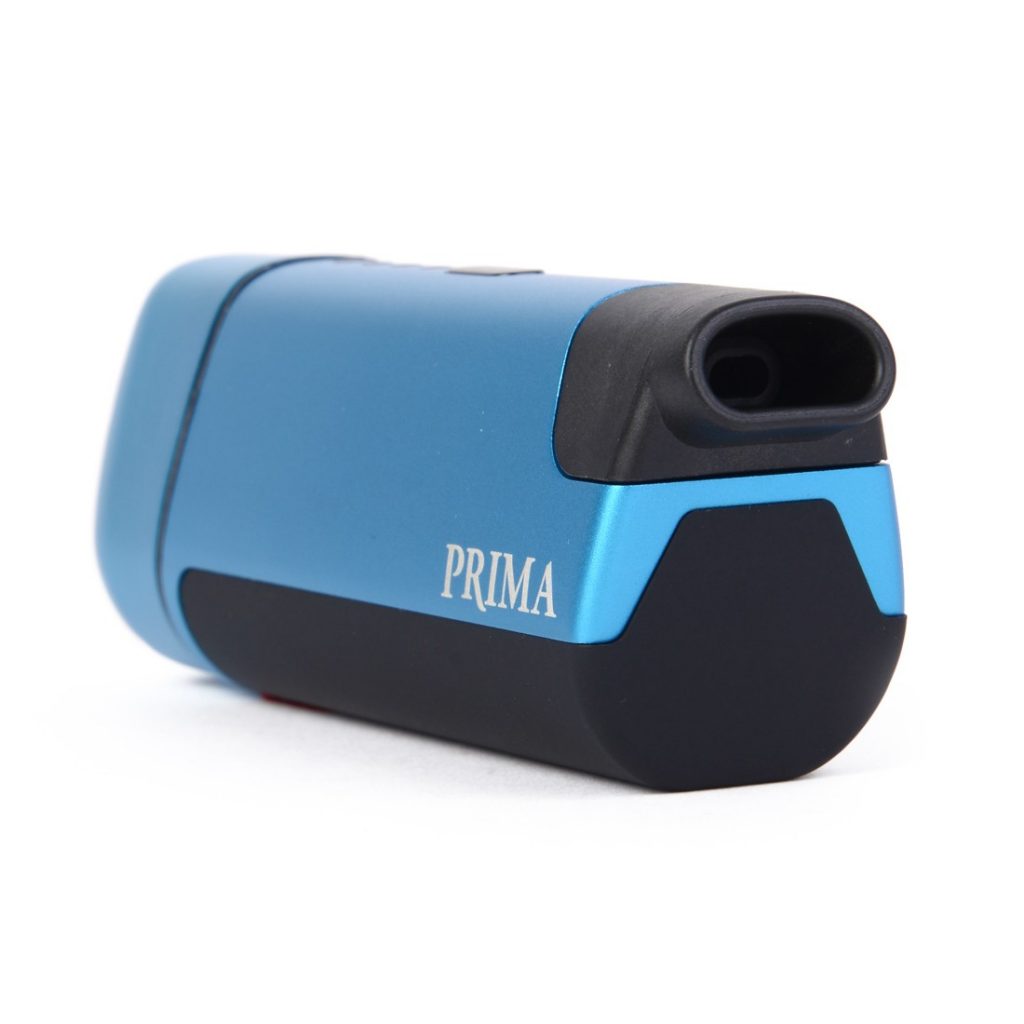
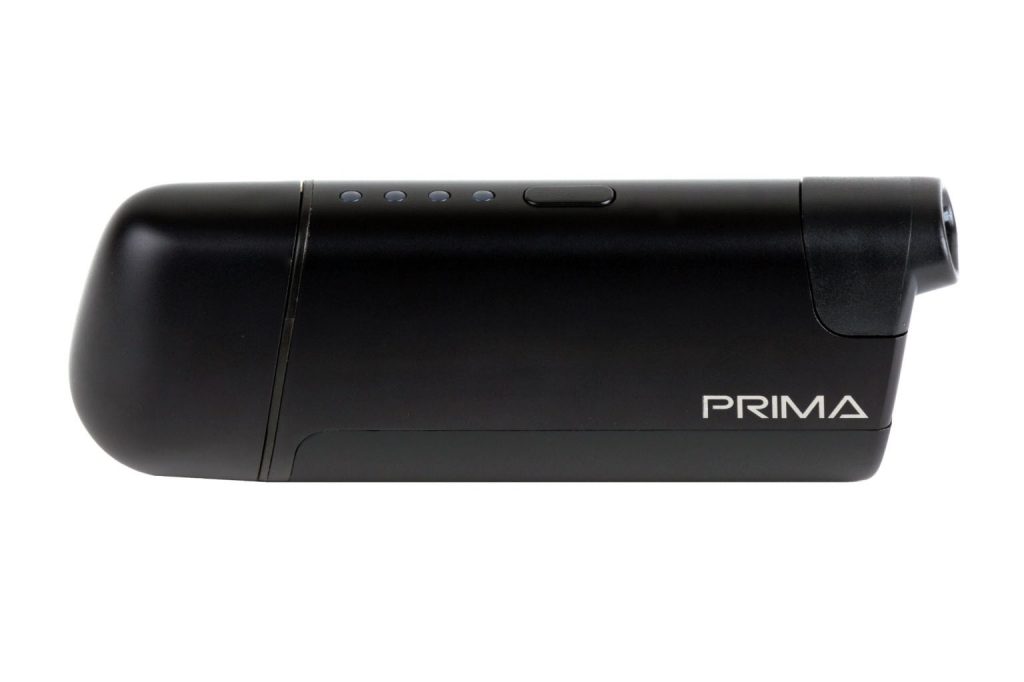
The DipStick also comes in four colors, so you can personalize your vape: black, pink, silver and blue.

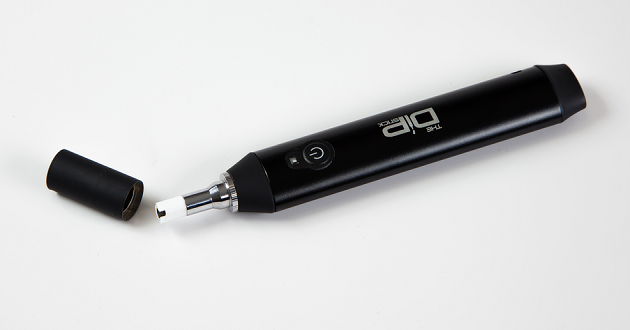
Magnetic Parts & Interchangeable Batteries

One of the great things about this vaporizer is that all components are magnetic. Disassembling and reassembling is a snap because of this.

The batteries are also interchangeable, so you can swap out a drained set for a fresh set on the go. And because everything is magnetic (including the mouthpiece), you won’t have to worry about dropping or losing pieces while you’re swapping batteries.

An interchangeable battery also means that you won’t be running around looking for an outlet to recharge your device when it dies. Just swap in a new set, and you can extend your session.

dip stick vapeClean Hits Every Time

A reclaim chamber is built into the pen, so you always enjoy clean hits. The chamber collects unused concentrate, which completely eliminates waste.

The pen completely disassembles, so you can throw all of the components in alcohol or hot water to clean it in between uses. A clean pen equals a clean hit.

You Control the Hits

DipStick gives you complete control over how big or small your hits are. Just tap the concentrate quickly for a little hit, or tap for a longer period of time for a big hit – and big clouds.

Quick and Easy Use

Because the DipStick is a touch-and-go device, you never have to deal with messy loading or fuss with extra tools just to get the pen ready for use. Just turn on the device, wait for it to heat up, touch the concentrate and inhale.

Of all the portable vapes out there, this is one of the easiest to use – hands down.

Lots of Accessories to Choose From

If you want to enhance your experience or just buy replacement parts for your unit, there are plenty of accessories to choose from, including:

  • Replacement batteries
  • Vapor tip
  • DipWhip
  • Airflow tube
  • Lanyard
  • Cleaning swabs
  • Concentrate jar

You can also buy replacement parts, including: reclaim chamber, tip cover, mouthpiece, battery cover and battery charger.

3-Year Warranty

The DipStick is backed by one of the best warranties in the industry. The three-year warranty protects your purchase, so if your pen stops working, you can have it repaired or replaced at no additional cost.
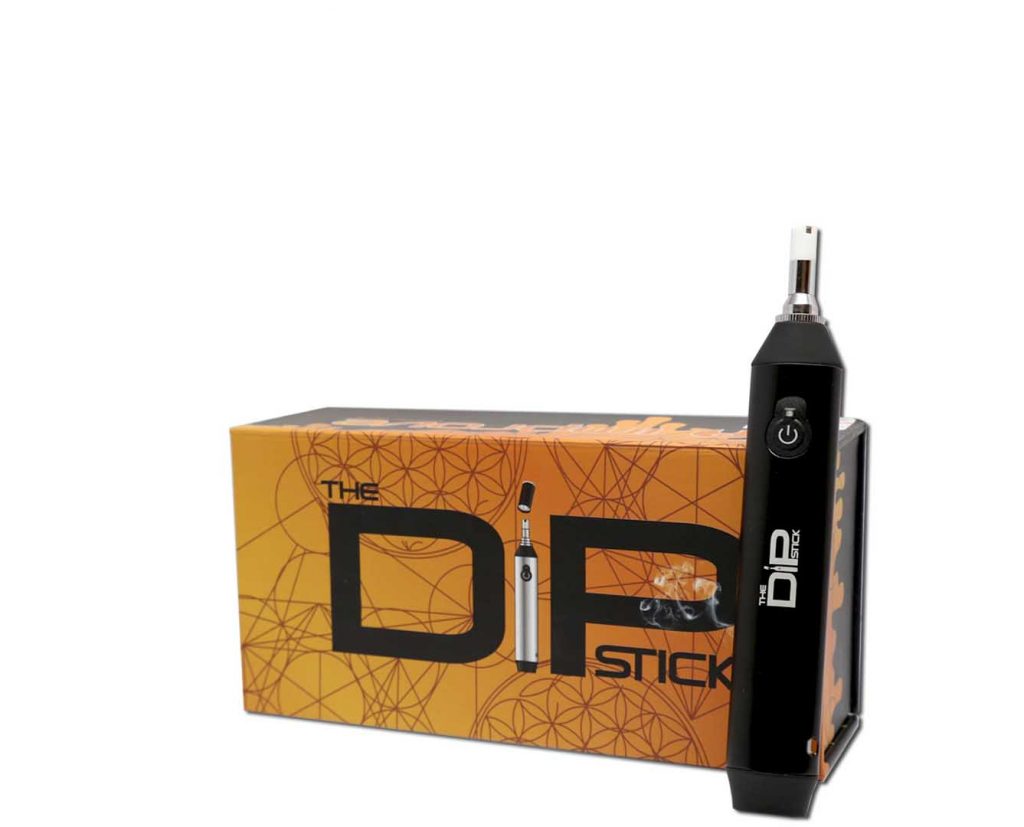
What’s in the Box?

  • dipstick dab vaporizerThe DipStick unit
  • Two vapor tips
  • Two batteries
  • Battery charger
  • Screwdriver
  • Lanyard
  • Cleaning swabs
  • Magnetic cap
  • Two glass storage jars

Is DipStick the Best Dab Vaporizer?

The main selling point with the DipStick is the flavor. There’s no waste or leftover product, so you never get that burnt taste. And because there’s no wick, there’s no need to worry about that awful dry wick taste either.

Aside from the clean taste, you also never have to deal with loading up the pen. You just touch it to the concentrate and inhale. It’s really easy to use, and equally easy to clean because of this.

The swappable batteries mean that you can continue your vaping sessions without having to find an outlet to recharge. Just change out the batteries and keep going.

[alert-warning]There’s a lot to love about this vaporizer, and if you prefer concentrates, the DipStick is really the way to go if you want portability. [/alert-warning]

It heats up quickly, and you can control the size of the hits with the length of your inhale.

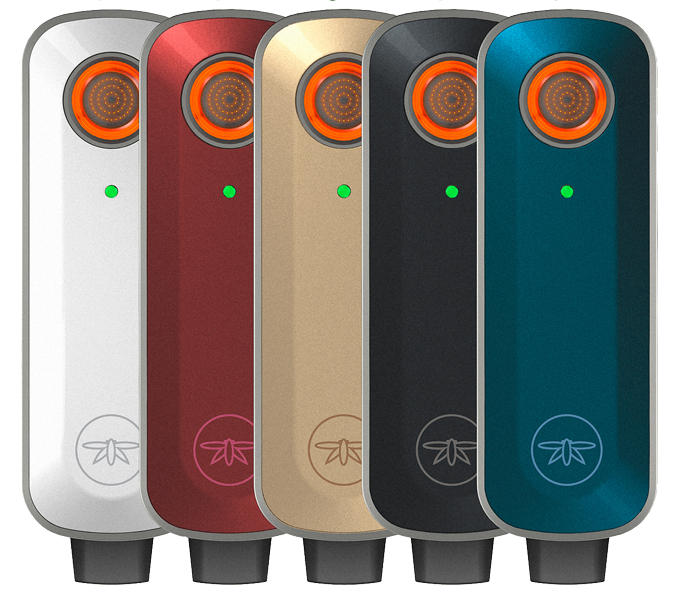
Would I personally say it’s the absolute best dab vaporizer out there?  First, let me say I am more of a traditional vape guy (FireFly 2 please) but if dabbing is your preference, it is the best we have tried.

s4

Vapir Prima Review


Looking like something out of a sci-fi movie, the Vapir Prima is a portable wax and herb vaporizer that delivers a clean, rich and flavorful vapor every time. We’ve seen this type of versatility with a lot of new models – compatibility with herbs, waxes and/or liquids – but they typically fail to deliver the kind of quality vapor you’ve come to expect from a single-material vaporizer.

But the Prima is different. Whether you’re using extracts or herbs, you’ll enjoy the same quality, rich vapor you crave.

The Vapir Prima has a lot to offer, but is it the best wax vaporizer out there? Let’s find out. If the Vapir Prima vaporizer reviews are right, it may just be the best model out there.

What Makes the Prima Unique?

prima vaporizer

price-checkOne thing that the Prima offers that many other portable vaporizers don’t is temperature control. While you won’t be able to set an exact temperature, you will be able to choose between four optimized temperature settings that are ideal for herbs and extracts.

  • Level 1: 350-360F
  • Level 2: 365-375F
  • Level 3: 380-390F
  • Level 4: 390-400F

With a wide variety of temperature ranges to choose from, this vaporizer is ideal for virtually all dry herbs and extracts.

Aside from temperature settings, the Prima also boasts a number of other standout features:

Compact Yet Efficient

[alert-warning]This Vapir portable vaporizer is compact in size, yet incredibly efficient.[/alert-warning]

Small enough to fit in your pocket, the Prima is just 4” x 1” in size, so it’s ideal for on-the-go use. And the advanced heating technology means that this vaporizer is more efficient than ever and delivers a clean, crisp and flavorful vapor with each draw.

Easy to Use

Vapir Prima mouthpieceOne of the biggest advantages of the Prima is that it’s so easy to use.

The heating chamber is on the opposite end of the mouthpiece.

  • To load up, just remove the cap and fill the chamber with your desired material.
  • Replace the cap.
  • Hold down the power button for three seconds to power up the unit.
  • Choose your desired temperature by toggling the power button. You have four levels to choose from.
  • Once you’ve selected a temperature, wait until all of the LEDs turn a solid green color.
  • Take your first draw.

In just a few minutes, the Prima is loaded and ready for use.

Extended Sessions

Vapir allows you to extend your session by two minutes. All you have to do to activate this setting is press the power button twice at any time.

If you don’t extend your session, the unit will automatically power down after five minutes. Before it shuts down, the LED lights will start blinking green to let you know what’s going on.

Quality Construction

The Vapir features a stainless steel vapor path and medical-grade components that have been tested for maximum durability.

The brushed aluminum body adds to the sleek look of this vaporizer but also protects it from damage.

Easy to Maintain

Easy maintenance is something all users can appreciate, and the Prima does a great job of making cleaning as simple as possible.

The stainless steel vapor path can be removed for easy cleaning in between sessions. Vapir includes a cleaning tool as well as a plug brush for stress-free maintenance.

The lithium battery is also removable, so you can replace the battery once its life has been depleted.


Multiple Accessories

In addition to a cleaning tool and plug brush, you also receive several other accessories, including:

  • Cap sleeve
  • Extra mesh screens
  • Extra cap screens
  • A scoop

Naturally, a battery charger is included as well as the battery itself.


Sleek Design

Vapir Prima ColorsThe sleek look of the Prima is an attractive selling point, and its modern design still allows the vaporizer to be small enough for easy transportability.

The Prima comes in four vibrant colors – silver, black, blue and orange – so you can choose a color that suits your personality.

Pros

  • Easy to use
  • Delivers clean, crisp and rich vapor
  • Can be used with herbs or extracts
  • Maintenance is a breeze
  • Compact design allows for easy transportability
  • Sleek design
  • Excellent battery life
  • Battery is removable and can be replaced

Cons

  • No precise temperature controls

The only gripe we had with this vaporizer was that it doesn’t offer precise temperature controls. While not the norm with portable models, we are starting to see some new models offering this feature. Considering its higher price tag (around $260), we were disappointed to find that it only offered temperature ranges.

With that said, the temperature settings are ideal for most extracts and herbs, so it shouldn’t be an issue. But if you’re going for precision temperature control, this may not be the right model for you.

The Bottom Line

Overall, the Prima exceeded our expectations at this pricepoint. The vapor quality is great, and the unit is exceptionally easy to use. We would have liked to see better temperature control, but we had no issues with combustion or weak clouds when using this model. Clean-up was a breeze, and we liked the automatic power-down feature.

The Prima’s compact size makes it great for use on the go, and the ability to choose between four colors lets you personalize your unit. For the price, the Prima delivers a great vaping experience and portability. We highly recommend this vaporizer to users of all experience levels, although vaping veterans may be more appreciative of this unit and all of its robust features.


Vapir Prima

v10

Atmos Transporter Review

Small, discreet and affordable, the Atmos Transporter delivers a pure taste in a vaporizer that’s easy to clean and maintain. While we’ve reviewed our fair share of portable vaporizers, we like the Transporter’s ease of use and vapor quality. Sure, it’s not a perfect vaporizer, but it’s a great option for both beginners and experienced users.

How Does the Atmos Transporter Work?

How Does the Atmos Transporter Work?What sets the Transporter apart from the competition is that it’s a true dry herb vaporizer. There are exposed heating coils – the heating element is built into the vaporizer. The built-in design eliminates the risk of combustion, which is a serious problem with a lot of portable vaporizers.

The embedded heating chamber is constructed with high-grade ceramic, so it delivers pure, delicious vapor every time.

Smart Design

As far as aesthetics go, the Transporter has a flask-like design, which makes it a little more discreet. No one will be able to tell that you’re carrying around a vaporizer.

atmos-transporter
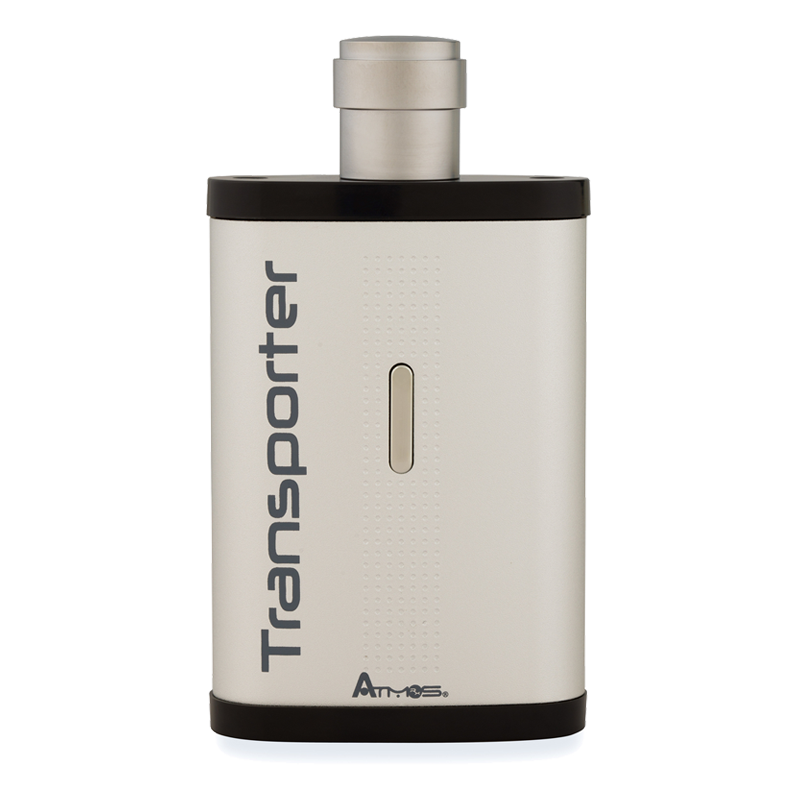
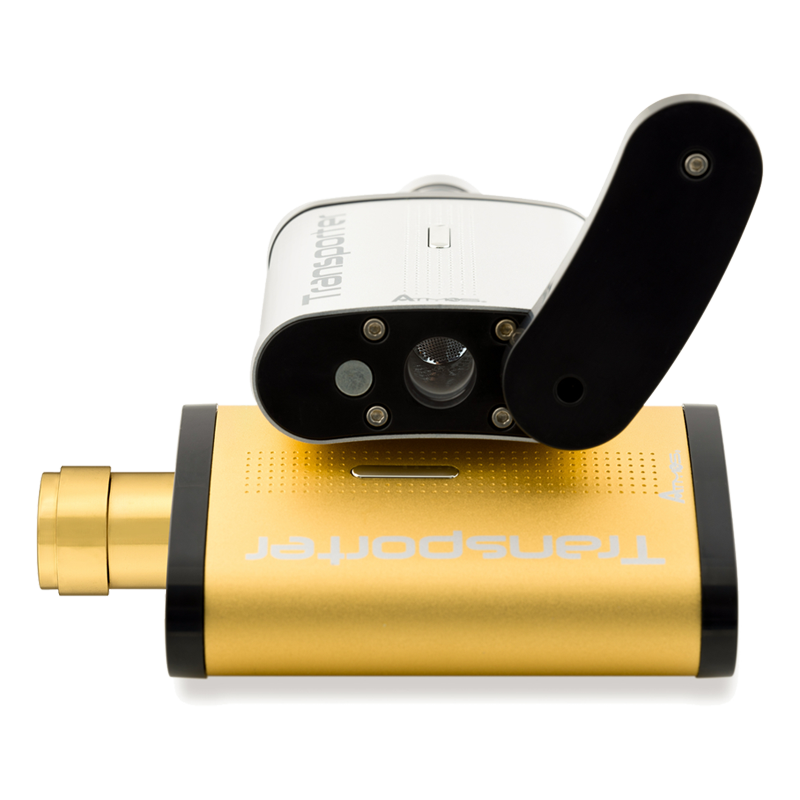
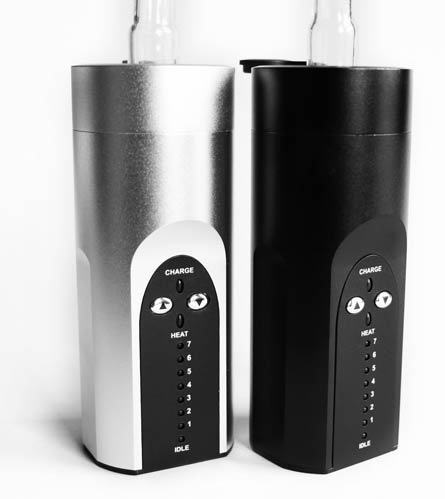
Its contoured design means that this vaporizer fits comfortably in your hand, and you can easily carry it around in your pocket, backpack or purse. It’s thinner than other Atmos vaporizers, which makes it far more transportable.

[alert-note]The exterior features an anodized shell that’s scratch resistant, so your vaporizer looks great even after extended use.[/alert-note]

The heating chamber sits on the bottom of the vaporizer, which means you can pack the bowl a little bit tighter. With other Atmos vaporizers, the heating chamber actually sits beneath the mouthpiece, which can cause issues with airflow restriction if you pack it too tightly. Having the chamber on the bottom minimizes the problem, which means you can enjoy slightly longer sessions.

Battery Life

The Transporter will give you between 1-2 hours use with a 3-hour recharging time. You can still use the vaporizer while it’s charging as long as the battery isn’t completely dead.   The battery is one of our favorite features as the 2 hour charge is more than enough for a few days worth of use for most medical patients.

Heating Temperature

The Transporter’s simple and easy-to-use design is part of what makes it so appealing, but one minor drawback is that you can’t adjust the temperature. There’s one setting, and while there’s no risk of combustion, you will find that the draw is a bit hot at times.

If you prefer the option of customizing your vaporizing experience, the Transporter may not be the best option for you. But keep in mind that the temperature is just right for most herbs, and there’s no danger of combustion.

Heat-up time is quick – about 45 seconds to a minute.

Easy to Use

One of the great things about the Transporter is that it’s so easy to use. The longest part of the process is packing the heating chamber.

But once you’re loaded up, all you have to do is press the power button on the front of the vaporizer five times in quick succession. This powers up the Transporter. Next, hold the power button down for five seconds, and the device will start heating up.

The power button will glow red at first until it’s heated up. Once the light turns green, you’re good to go.

And when you’re ready to turn it off, just press the power button five times in a row to shut it down.

To get to the mouthpiece, you’ll need to unscrew the cap at the top of the vaporizer. The cap adds to the flask-like design, but it also protects the mouthpiece while keeping it clean.

Packing the chamber is easy, too. The chamber lid is situated on the bottom of the vaporizer, and it swivels out to the side for easy loading.

price-checkEasy to Clean and Maintain

Just like any other vaporizer, you’ll need to clean the Transporter from time to time just to preserve the vapor’s clean taste. Cleaning is easy, and Atmos does include a brush to make the job easier.

After every few sessions, just use the brush to (carefully) wipe down the heating chamber and clean out the mouthpiece. Cleaning takes less than two minutes, and you don’t have to do it quite as often as you do with other portable vaporizers.


An Affordable Vaporizer

With a robust design, the Transporter offers great value for the money. The embedded ceramic heat chamber prevents combustion while heating the herb evenly for a great vaping experience. It’s easy to use and maintain, and it’s small enough to fit in your pocket.

Other portable vaporizers with similar features can cost upwards of $200 or more, but Atmos manages to offer the Transporter at a more attractive price point simply by keeping things simple. Whether you’re just getting started or you’re an experienced user on a tight budget, the Transporter is a great option for – well, anyone.


The Bottom Line

atmos-transporter-review


The Atmos Transporter is easy to use, produces great quality vapor and comes at an affordable price. While it’s not perfect (there are no temperature settings, and the vapor can be on the harsh side at times), it’s an excellent option for anyone who is just getting started or looking for a budget-friendly vaporizer to take on the go.

The Transporter’s efficient design and ceramic chamber ensure that your herbs are heated evenly for smooth, rich vapor. And because the heating chamber is on the bottom of the device, you can pack it a little bit tighter for longer sessions.

As one of the only true dry-herb portable vaporizers out there, the Transporter’s value is hard to beat, and you won’t be disappointed by the vaping experience.

Click here to get the Atmos Transporter vaporizer today.

s2

Indica Vaporizer Review

Indica 2 is a vaporizer that’s so discreet, you’ll forget you’re carrying around a vape.

Indica vaporizer

Designed to look like a giant lighter (Zippo lighter to be precise), this portable vaporizer is pocket sized, offers a great capacity, and is built to last.

What Makes the Indica Vaporizer So Special?

The Indica only catches the attention of those who are in the know. At first glance, you’ll mistake it for a Zippo cigarette lighter. The stealth factor of this vaporizer is unmatched.

But it’s not just the vaporizer’s sleek design that makes it stand out in the crowd: its portability is second to none. The Indica truly is a pocket-sized vaporizer that’s small enough to go wherever you go. Standing at just 3.15” tall, the only other vaporizer to rival its size is the MFLB (Magic Flight Launch Box). And its smart features make it a pleasure to use.

LED Indicator

The Indica features an LED indicator that lets you know when it’s time to recharge, and also lets you select the internal chamber temperature.

By pressing the LED button down for 3 seconds, the vaporizer will display the current battery life.

  • White/Blue: 100% charged
  • Green: 20-60% charged
  • Red: 0-20% charged

Using the included wall charger, the Indica will recharge from 0-100% in just three hours. Each charge will give you about 1.5 hours of continuous use.

Temperature Control

Using the LED indicator, you can control the temperature of the heating chamber. Choosing the optimal temperature will ensure you have the best vaping experience possible.

The Indica offers 6 temperature settings:

  • Cyan: 340 degrees F
  • Blue: 358 degrees F
  • Green: 376 degrees F
  • Purple: 394 degrees F
  • Red: 412 degrees F

To access the temperature control, press the LED button twice. Simply press the button twice each time you want to increase the temperature. The Indica will cycle through the above listed temperatures, so you can enjoy a truly personalized vaping experience.

Chamber Capacity

The chamber capacity of the Indica is impressive. It can hold up to 0.26g of tobacco/herb. That’s nearly double the capacity that competing vaporizers offer. The chamber volume is 12.8mm. Each full chamber will give you 30-40 drags.

The Indica was designed to offer the maximum yield from each pack of tobacco. Compared to other vaporizers on the market, the Indica offers a cooler, smoother vapor with a rich tobacco flavor.

With the ability to change the temperature of the heating chamber, you have complete control over the density of the vapor. The lower the temperature, the lighter the vapor. Higher temperatures will yield thicker, more flavorful vapor without combusting the tobacco or herbs. This is a rarity as so many conduction vaporizers wind up simply burning the material, rather than vaporizing it.

When you purchase an Indica, you will receive everything you need to get started. Each Indica vaporizer comes with the following:

  • The Indica vaporizer
  • Brush
  • Cleaning kit
  • Carrying pouch
  • Beautiful wood case
  • Charging kit

Indica 2 vaporizer

The brush and cleaning kit will keep your vaporizer working in top condition, and allows you to easily remove debris from the chamber and mouthpiece.

The ornate wood case provides you with a convenient place to store your Indica when it’s not in use, and the carrying pouch allows you to take your vaporizer with you on the go.

If you prefer not to carry around the pouch, you can always carry in the Indica in your pocket or purse. It’s small and discreet enough to be taken just about anywhere.

How to Use a Vaporizer

The Indica is so easy to use. Before your first use, you’ll need to charge it for a full 12 hours. After this initial charge, each charging cycle will take about 3 hours.

Each charge will give you about 1.5 hours of continuous use.

Here’s what you’ll need to get started:

  • The Indica vaporizer
  • Ground tobacco
  • Vape pick
  • Mini spacers
  • 2 vape picks
  • 4 replacement screens
  • 3 mini spacers
  • A spare chamber door
  • Silicone cover
  • Wall charger
  • Instruction manual

Once you have everything you need, it’s time to start vaping.

  1. Simply slide the chamber door down to unlock it, lift off the chamber door and lock it to the bottom of the vaporizer.
  2. Add the tobacco.
  3. Place the mini spacer on top.
  4. Use the vape pick to push down on the mini spacer and pack the tobacco.
  5. Replace the chamber door.
  6. Hold down the power button for three seconds to turn the Indica on.
  7. Press the power button twice to activate the first heat setting. Continue pressing the button in two-push increments to cycle through the temperatures.

Once you have the desired temperature setting, wait until the LED blinks twice to indicate that the Indica is ready for use. Take a slow, smooth drag and enjoy the Indica’s easy vape.

After 10 minutes of being set to a single temperature setting, the device will shut itself off automatically to conserve power.

Cleaning and Maintenance

Cleaning and maintenance will keep your Indica running in tip top shape. Everything you need to keep the vaporizer clean is included.

Here’s what you’ll need:

  • The Indica vaporizer
  • Vape pick
  • Cleaning brush
  • Pipe cleaners

To get started, you’ll need the vape pick.

  1. Open the chamber door.
  2. Hook the bottom of the vape pick onto the mini spacer to remove it.
  3. Remove all tobacco from the chamber.
  4. Remove the mouthpiece from the body.
  5. Using the pipe cleaner and brush, clean the inside of the mouthpiece.
  6. Using the pipe cleaner, thoroughly clean the chamber.
  7. Use the cleaning brush to remove any remaining debris from the chamber.
  8. Reattach the mouthpiece.

Now, you’re ready to reload the chamber and start vaping once again.

If stealth and portability are your top priorities, the Indica 2 is unmatched, even among the other top rated portable vapes from Storz & Bickel (makers of our desktop choice, The Volcano).

Easy to use and great quality vapor, you can take the Indica with you on the go and never have to sacrifice a pleasurable vaping experience. Five temperature settings allows you to choose the perfect temperature for your herbs or tobacco. With the Indica 2, you enjoy a truly personalized vape. And its capacity is nearly double the capacity of its competitors. As the makers of Indica say, this vaporizer is “discreet, yet revolutionary”.


Click here to get your Indica 2 vaporizer today.

 
Indica


FireFly 2 Vaporizer Review

The FireFly changed the vaporizer industry by becoming the only pure convection portable model on the market. It was a bit bulkier in size, but that was okay because it still fit in your back pocket and produced fantastic vapor quality.

Now the FireFly Vaporizer 2 is set to change the industry again, with new upgrades and improvements that will please even the more pretentious users.

What’s So Special about the FireFly 2?

FireFly 2
The FireFly 2 is 33% smaller in size & 55% lighter.

[wp-review]

There’s a lot to love about the FireFly 2.

Its sleek design and smaller size are two glaring improvements, but it’s what’s under the hood (the internal design) that really matters.

FireFly 2 For Sale

#1) Incredibly Versatile

Like to switch between loose-leaf and concentrates? No problem.

The FireFly 2 can handle it all. No matter your material preference, the FireFly will deliver consistent, top-shelf vapor quality. You’ll even get a set of concentrates pads with your purchase, so you can easily choose the material of your preference without having to buy any extra accessories.

#2) Lighter and Smaller

One complaint (albeit minor) that users had with the original FireFly was its bulky, larger size. The vaporizer’s designers improved on this by making the FireFly 2 33% smaller in size and 55% lighter. It’s similar in size and weight to the Air and Crafty vaporizers.

While not the smallest unit in the industry, it’s still small enough to fit in your pocket, backpack, purse or glove box.

[alert-success]Customizable Vaporizing Experience[/alert-success]

price-check

Vaporizing is a personal experience. The makers of the FireFly 2 understand this, and have created a portable vaporizer that puts you in the driver seat. This is another huge improvement on the original FireFly.


There’s just one caveat. Rather than add more bulk to the vaporizer, an app is used to customize your temperature settings, touch sensor activation and more.

There are six preset temperatures to choose from, which lets you select the ideal setting for your material – whatever it may be.

The six preset temperatures include:

  • 340F
  • 360F
  • 380F
  • 400F
  • 420F
  • Concentrates


The app also lets you view the battery level at a glance. The app is free and completely optional. The FireFly 2 will heat up to 400F if no preset temperature is selected.


The unit also comes in a variety of colors, including: Blue, Gold, Red, Black and Silver. Now, you can customize the look of your vaporizer, too.

FireFly 2 Colors
Updated Colors

Quick Heat Up and Recharge

Heat up time is one of the fastest we’ve ever seen. In just three seconds, this unit can reach 400F. You’re up and running in record timing.

A little green LED gives you the green light to start vaping. And if you want to change the temperature, just use the app to select the setting you want.

When you’ve exhausted your FireFly 2, recharging won’t leave you waiting for long. The entire unit can recharge in as little as 45 minutes.

Plus, the included USB 3.0 cable lets you connect to any tablet or mobile phone charger.

The battery is one of the biggest improvements on the original FireFly, which had a very short battery life per charge. According to the manufacturer, they’ve improved the battery on the FireFly 2 by 100%.

And two batteries are included, which is something you don’t find with most vaporizers. Batteries are swappable, just like with the original FireFly, so you can purchase new batteries when necessary.

Convection Heating. Easy Cleaning

The FireFly 2 maintains its convection heating design, which means you only heat your material when you inhale. In other words – your material never combusts. And with the ability to customize the temperature setting, you can truly enjoy your vaporizing experience.

When it comes time to clean the unit, the makers of the FireFly 2 made the process as simple as possible.

A magnetic lid makes loading and cleaning a breeze. And the borosilicate glass vapor path allows for clean aromas and flavors every time.

The mouthpiece even includes a particulate filter to keep debris from reaching your mouth.


How to Use The FireFly 2 Vaporizer

How to Use FireFly 2 Vaporizer

The FireFly 2 is just as easy as to use the original:

  1. Remove the magnetic oven lid.
  2. Pack the bowl with your material (or liquid – make sure the concentrate pad is in the bowl).
  3. Place the oven lid back onto the unit.
  4. Activate the touch sensor on each side of the unit.
  5. The green light indicates that the unit is ready for use.
  6. Inhale and enjoy.


Firefly 2 Vaporizer Tips

FireFly 2 Vaporizer Review

New to using the FireFly 2? Here are some tips to improve your vaporizing experience:

  • For best results, stir the bowl after taking a few draws.
  • If you don’t pack the bowl too tightly, you can stir the material by tapping the unit against your hand.
  • The unit doesn’t need to be cleaned often. When it does, just use the included cleaning brush and isopropyl alcohol wipes to clean out the oven and borosilicate glass vapor path.
  • You can use the old charging dock that came with the FireFly 1 if you have the old unit.

Don’t forget to use the Concentrates temperature setting (500F) and the concentrates pads if you’re using liquids or concentrates in this unit.


Where Can I Get the FireFly 2?

gamechanger
You can find the new FireFly vaporizer for sale on its official website, but it won’t be released until late May 2016.  You can pre-order your unit today for $329.95 from VapeWorld.com.

What’s Included?

When you purchase the FireFly 2, you receive:

  • The FireFly 2 unit
  • A USB 3 charger
  • Charging dock
  • Cleaning kit
  • 2 batteries (rechargeable)
  • 3 x Concentrate pads

The only thing you need to supply is the material, and you’re ready to start using this vaporizer right away.


Pax or FireFly?

firefly-2-vs-pax-2

You’ve read the positive FireFly V2 reviews, and you’ve probably seen comparisons between the FF2 and the Pax 2 –one of the best-selling portable vaporizers.

Which one should you choose?

That depends on your personal preferences.

The Pax 2 is smaller in size and lightweight. But as far as temperature settings go, you only have four options. Changing temperatures is a bit more convenient with the Pax 2, though. All you have to do is hold down the power button to enter the temperature mode, and choose between green, yellow, orange and red.

The oven on the Pax 2 is a bit deeper, so you can pack more material, and the price is lower. But that’s really where the benefits end.

The FireFly 2 uses pure convection heating. It also has more temperature options and gives you the ability to choose between loose leaf and concentrates. The battery is swappable, and the unit itself is incredibly easy to clean.   If you take your vapor quality seriously, then the FireFly v2 is a definite upgrade over the Pax 2 model.

As far as recharging time goes, the FireFly 2 wins out. In just 45 minutes, you’re up and running again. It takes the Pax 2 much longer to recharge.

[alert-announce]The flavor and aroma quality alone is enough to make the FireFly 2 win over the Pax 2.[/alert-announce]

If budget is your primary concern, the Pax 2 may be the right option for you.  But if vapor quality, versatility and personalization are your top priorities, FireFly 2 is, without doubt, the clear choice. And it’s still less than $100 more than the Pax 2, making it worth the extra cost.

s3


G Pen Elite Review

You’ve heard of the G Pen and the G Pro (who hasn’t?), but Grenco Science has a new portable vaporizer up their sleeve: the G Pen Elite vaporizer.


While its profile is bulkier than its other portable counterparts, the Elite improves on the features the Pro and Pen were lacking in. Small, sleek and easy to use, the Elite may just be the best vaporizer under $200.

What’s So Special About the G Pen Elite?

G Pen Elite Review

The original G Pen was a major success for Grenco Science, and the Snoop Dogg vaporizer was a best-seller.

A ceramic wick, high-powered heating coil and a robust tank system, the G Pen was a step in the right direction for portable vaporizers.

But while they’re incredibly affordable, users were looking for more – a better version of the original Pen. And so, the Elite was born.

Coil-Less, Ceramic Chamber and Rapid Heating

The Elite has a coil-less ceramic chamber that allows for even heating from all directions. In just 30 seconds, this portable vaporizer will heat up to your desired temperature – that’s lightning fast.

Customized Temperature Settings

One of the biggest improvements to the Elite is the custom temperature feature. Now, you have the option to choose the ideal temperature for your material, with a range of 200-428F.

And with the ability to heat up at rapid speeds, you enjoy delicious vapor and a rich aroma in less than a minute – and without burning your material.

A Bigger Chamber

The Elite really is elite, with the biggest chamber capacity on the market: 0.75g.

Just a quick note: the Elite is only compatible with ground material, and there’s no option (yet) to make this vaporizer compatible with liquids or waxes.

Ergonomic Design and Sleek Interface

Although bulkier than the original Pen and other portable models in Grenco’s lineup, the Elite is still compact with an ergonomic design.

Engineered for portability, this vaporizer is comfortable to hold, and won’t easily slip out of your hand.

A brilliant, bright display is located at the bottom of the vaporizer. The sleek LED interface shows you the battery life and chamber temperature, so you can see – at a glance – how much time you have left, and whether you need to adjust the temperature.

Stealth Design

GPen Elite vaporizer

zer0

A simple power button sits on the front of the vaporizer, while the LED display is tucked away – out of plain sight. With a simple, sleek black design, the Elite is a great option if stealth is your top priority.

Easy to Use and Maintain

The Elite is just as easy to use as other Grenco vaporizers. Here’s how it works:

  • Charge up the Elite (about 3 hours).
  • Remove the mouthpiece. To do this, grip both sides with one hand, and lift one side up.
  • Load the chamber with ground material. Make sure that it’s fully loaded.
  • Press the front panel button 5 times in succession to turn on the vaporizer.
  • Use the two buttons on the side of the device to choose your preferred temperature.
  • Hold down the front power button for one second.
  • Wait for the LED lights to indicate that your set temperature has been reached.
  • Enjoy!

When you’re done using the vaporizer, use the included small cleaning brush to clean out the chamber and mouthpiece. Doing this will remove any leftover debris or reside from your material.

Tip: Use rubbing alcohol for a deeper clean, but wait until the chamber is fully dry before using it again.

The Elite has clearly improved on a lot of the features that the original G Pen was lacking, but it also improves on other vaporizers from Grenco, including the G Pro.

The G Pen Elite vs G Pro

The G Pro is the vaporizer that’s in between the G Pen and the G Elite. It has a lot going for it, and you’ll find quite a few unique versions of this vaporizer, including DGK, Black Scale and Snoop Dogg BUSH versions.

Like the Elite, the Pro is compatible with ground material. But that’s where the similarities end.

Although better than other materials, the Pro has a stainless steel heating chamber rather than a ceramic one. Ceramic allows for even heating, but stainless steel isn’t quite up to par in this respect.

The Pro also only allows for three temperature settings:

  • Red: 320F
  • Green: 380F
  • Blue: 420F

While it’s great to have some options when it comes to temperature, you want precise control, so you can choose a setting that offers the most flavor and the best aroma for your specific material.

The Elite gives you the option of choosing your own precise temperature, so you can heat the material to the appropriate level. And you’re offered a wide temperature range, which makes this vaporizer ideal for all ground material.

The Pro’s design is a bit thinner, but it’s not ergonomically designed, so it’s not quite as comfortable to hold as the Elite. Both fit nicely in your pocket, which is certainly a bonus.

One area where the Pro excels is price. You’ll spend more on the Elite, but you get a superior heating chamber and the ability to choose your preferred temperature.

When comparing the two, the Elite is the clear winner. It improves on all the issues that the Pro and the Pen had, and it offers a better overall vaping experience.

Is the G Pen Elite the Best Portable Vaporizer on the Market?

The question on everyone’s mind: is this the best portable device you can buy? Maybe.   The answer depends on your budget.

Buying a vaporizer is a personal experience, but if you’re looking for a device that offers even heating, temperature control, rapid heat-up times and a sleek, ergonomic design, the G Pen Elite is one of the best out there – period.

And the great thing about the Elite is that it’s priced lower than some of the top-selling models, including the Pax 2 and Arizer Air. For under $170, you’ll get a portable vaporizer that’s on par with the top models on the market.

[wp-review]


Click here to try the G Pen Elite today.

price-check

Vapium Summit Vaporizer Review

The Vapium Summit vaporizer is compact, easy to use and rugged in design. It’s not a fancy vaporizer, but that’s the point. It’s the only portable vaporizer designed for the backcountry.

vapium-summit-vaporizer-blue
Sleek. Rugged. Affordable.

Built tothstand heavy outdoor use, you can take this rugged vaporizer with you when you’re hiking, camping, skiing, mountain climbing or backpacking around the world.

Is it the best portable vaporizer out there? For people who love the outdoors – yes. Its features and design allow the Summit to adapt to rough environments without ever compromising on vapor quality.

Our Vapium Summit Vaporizer Review

What Makes This Vaporizer So Special?

The Summit may not have a sleek design or fancy party modes, but it does have an ergonomic grip design that ensures you never lose hold of your vaporizer – even if you’re traveling in wet weather.

And it boasts 8 temperature settings, too, so you can heat up your herbs to just the right temperature.

Everything about this vaporizer was designed with on-the-go use in mind. The Summit is:

  • Easy to draw with little draw resistance.
  • Built with food and medical grade materials to maximize flavor.
  • Tested for use in extreme cold and snow.
  • Safe and reliable, with one hour continuous use on the highest setting and an automatic shut off feature.

Temperatures range from 320°F to 446°F with 8 preset temperatures to choose from.

The easy draw mouthpiece was designed for low resistance inhalation, so no matter your altitude or the temperature outside, you can vape to your heart’s content.

Vapium Summit Vaporizer

A built-in LED display lets you see the battery life and temperature setting at a glance, so you can continue on your journey without distractions.

And the stealthy vibration notifications let you know when your device is ready for use without announcing it to the whole world – or just your trail mates.

The convenient USB charging port lets you use the Summit even when it’s recharging, and the rubberized grip prevents slips and drops that can easily happen when you’re out on the trail.

The magnetic snap-together assembly makes maintenance a breeze, and the magnetic lid is tethered, so you don’t lose it when filling the chamber.

Both the air path and heating chamber are constructed with food grade materials, so flavor is never compromised.

The Summit produces a lot of vapor, and the flavor is rich and smooth. The chamber holds up to 0.3g of finely ground herbs, which will give you up to 20 draws.

With so many amazing features, you’re probably thinking that this vaporizer costs the same as the Pax – maybe even more because of its rugged design. You’d be wrong. At just $149.99, the Summit offers tremendous value for the money.

How Does The Vapium Summit Work?

Summit Vaporizer Review

Using the Summit is easy:

  1. Remove the heating chamber lid.
  2. Fill the chamber with your favorite dry herbs.
  3. Replace the lid.
  4. Hold the GO button down for 3 seconds to power up the vaporizer.
  5. Tap the “+” and “-“ buttons to adjust the temperature.
  6. Press the GO button again.
  7. The GO button will turn green and the vaporizer will vibrate when it’s ready for use.

The Summit gives you one hour of continuous use on the highest heat setting. And when you’re ready to start recharging, you can keep your session going. The USB charger lets you continue using the Summit even when it’s recharging.


How Does the Summit Compare to the Competition?

vapium summit colors

Can the Summit even compare to some of the most popular portable vaporizers, like the Pax and Arizer Air?

Summit Vaporizer Vs Pax

The Summit and the original Pax have a lot in common. Their designs aren’t too far off from each other, although the Summit is a bit thicker. Both have magnetic oven lids, which make it easy to fill and clean the filling chamber.

But the original Pax does falter in one key area: temperature setting. The Pax only has three: low, medium and high. And to access the button to change the temperature, you have to remove the mouthpiece, which can be a hassle – especially if you’re on the go.

You can’t use the Pax while it’s charging either, and the Summit comes at a lower price. The Summit is the clear winner here.

Vapium Summit Vs Pax 2

Priced significantly higher than the Summit, the Pax 2 is arguably the best-selling portable vaporizer on the market. Can the Summit compare?

The Pax 2 offers a deeper oven and a high-capacity battery that offers 30% more usage time than the original Pax. Pax 2 has four heat settings, and a more compact design. It comes with a whole bunch of different party modes, too, which really have no effect on vaporization at all.

The Pax 2 has a lot going for it. Its battery life is longer than the Summit and it can hold more material. But we’re not sure it can survive a rugged environment like the Summit can. If you’re looking for a vaporizer that you can take with you on your outdoor adventures, the Summit is the better option.

Vapium Summit Vs Arizer Air

The Arizer Air is an impressive portable vaporizer. It features a ceramic heating element, glass dishes and rechargeable batteries that are actually interchangeable. You get one hour of continuous use, and can even use the unit while it’s charging.

The Air doesn’t have quite as many temperature settings as the Summit, but it does offer 5 altogether, with ranges from 356°F to 410°F.

The Air does have its advantages, and the Summit is pretty similar feature-wise. But again, the Air is not designed for rugged environments, so it’s not well-suited for outdoor, on-the-go use.

The Summit is the only portable vaporizer that can survive the backcountry. Whether you love hiking, camping, skiing or snowboarding, the Summit is the only vaporizer that’s designed for use in rugged environments. With many of the same features as the top portable models, this vaporizer delivers smooth and delicious vapor every time.


Click here to get the Summit Vaporizer today.

snapshot


Arizer Solo Review


The Arizer Solo isn’t the sleek portable vaporizer that looks like a pen or a cigarette lighter. It doesn’t have a cute design or fancy modes (I’m looking at you Pax 2). What it does have is a smart design, and the ability to produce some serious clouds.

arizer-soloDon’t get me wrong, the Arizer Solo does have a modern look, and it’s easy to use. But its design is an homage to old school vaporizers – which isn’t a bad thing.

At the end of the day, looks don’t matter. It’s what’s inside that counts. In this Arizer Solo review, we’ll take a closer look at how this vaporizer works, what accessories are available and how it stacks up to the competition. Is the Solo the best portable vaporizer? Let’s find out.

How the Arizer Solo Works

With a ceramic heating element, convection heat and glass stem, the Solo offers a superior vaporizing experience. It runs on a rechargeable Lithium ion battery, and stands just 4.75” tall.

The durable matte black exterior protects the internal components, and is highly resistant to scratches and general wear and tear. There’s a solid foundation around the heating element, too, which adds an extra layer of protection.

Temperature Settings

The Arizer Solo temperature control system offers 7 different setting, so you can choose the right one for your material.

  • Level 1: 122F (50C)
  • Level 2: 365F (185C)
  • Level 3: 374F (190C)
  • Level 4: 383F (195C)
  • Level 5: 393F (200C)
  • Level 6: 401F (205C)
  • Level 7: 410F (210C)

The Solo doesn’t offer precise temperature controls, like what you would get with the Volcano, but it does offer a myriad of settings, which will suit any material.

Heat-up time is lightning fast. The lowest temperature setting takes just 15 seconds to heat up, while the highest temperature setting takes just two and half minutes.

It’s easy to see the temperature level at a glance. There are 7 LED lights for each heat level, and the corresponding light illuminates to let you know which setting you’re on.

Extended Battery Life

The Solo is powered by a rechargeable Lithium ion battery, and offers extended vaporization. Just one charge will give you 1-2 hours of continuous use. And it takes just 4 hours to recharge.

Automatic Shut Off

Forget to turn your vaporizer off? No problem. The Solo will automatically shut down after 12 minutes of idle time, so you never have to worry about burning your material – or setting your house on fire.

Arizer Solo Instructions

Arizer Solo vs Air

The Solo has an impressive list of features, but is it easy to use? If it’s a chore to get your vaporizer loaded and ready to go, you won’t want to use it.

The good news is that the Solo is very easy to use.

Here’s how it works:

  1. Charge up the battery. You’ll see a green flashing light just under the Charge label on the front of the vaporizer. Unplug the vaporizer.
  2. Press the two buttons simultaneously for one second to turn on the device.
  3. Press the left button to adjust the temperature to your desired setting.
  4. While the device is heating up, load up the glass stem. Try not to grind your herbs too finely or pack them when they’re too dry, as this makes it harder to keep the material in the stem.
  5. Open the top chamber on the Solo.
  6. Insert the glass stem. You may need to use some gentle force to get it into the chamber.
  7. Take your first draw, and you’re good to go.

The Solo’s oven design ensures that your herbs are baked evenly, and because the stem’s bowl is relatively small, you never have to worry about stirring.


Arizer Solo Accessories

The Solo produces great-tasting vapor on its own, but you can buy accessories to push your vaporizing sessions to the next level – or just change things up a bit.

On Arizer’s official online store, you can buy the following accessories:

  • Arizer Solo stems (curved and straight)
  • Stem cap pack
  • Glass aroma dish
  • Stainless steel stirring tool
  • Car charger
  • Power adapter

These accessories are great, but if you do a little digging, you can find even better ones – like the Arizer Solo stealth adapter. This adapter actually works with a cup (small or medium sized), like the ones you get at fast food chains. All you have to do is hide the Solo in the cup (with some ventilation holes on the bottom), and attach the stealth adapter for undetected use when you’re on the go.

How Does Arizer Solo Stack Up Against the Competition?

Arizer Solo Accessories

You know how the Solo works, how to use it and which accessories are available. But how does it compare to the competition?

Arizer Solo Vs Air

The Air, also from Arizer, is even smaller than the Solo and incredibly portable. Like the Solo, the Air has a ceramic heating element and glass dishes.

You get about an hour of use with the Air, and you can even use it while it’s recharging. You also have the option of being able to use spare batteries.

The Air doesn’t have as many temperature settings, and it comes at a higher cost.

The Solo is the better option – but only slightly. It’s more affordable, and you have a greater range of temperature settings for a use with more materials.

Arizer Solo Vs Pax 2

The Pax 2 is often called the king of portable vaporizers, and rightfully so. It’s small (about 4” tall) and sleek, and it offers advanced features, like a sensor that automatically detects your lips when you go to take a draw.

But the Pax 2 costs significantly more than the Solo, and it only offers four temperature settings.

The Solo wins here, too, because you get more temperature control and you won’t have to spend an arm and a leg when you buy it.

Arizer Solo Vs MFLB

The Magic Flight Box (MFLB) is another popular portable vaporizer, and it really does have a beautiful design. Compared to the Solo, it’s the cheaper option, but it doesn’t offer any temperature control or convection heating.

The Solo is the clear winner here, but if you’re on a really tight budget, the MFLB may be your only worthwhile option.

The Solo manages to bring convection heating to a device that’s easy to use and gives you quite a bit of control over the temperature. All of this is packed into one compact device that comes at an affordable price. We’d say it’s one of the best – if not the best – portable vaporizers out there.

For collectors, the Solo vape is a must have and with the wealth of available accessories this Arizer model looks to last the test of time.

s3


QuickDraw 500 DLX Vaporizer Review – The Pax Killer?

The QuickDraw 500 DLX may be the best vaporizer that you’ve never heard of. Known for its unique design, this model features 3-in-1 power to provide exceptional-tasting vapor, a compact shape and numerous color choices.

In short, the QuickDraw vaporizer is different – in a good way.

And this may be the one vaporizer on the market that has a chance at dethroning the Pax 2 (if you’ve ever tried the Pax 2, you know that this is a bold statement).

How the QuickDraw 500 Vaporizer Works

quickdraw-vaporizer-review


The QuickDraw is different; we’ve already mentioned that, but why? What makes this model so unique is that it offers three cartridges all in one system, hence the 3-in-1 vaporizer design. These cartridges are part of the “Smart Cartridge System” that allows you to seamlessly switch between fluids, concentrates or ground material.

That’s right – you have options that other vaporizers don’t offer.

Want to put some herb in your vaporizer? No problem. How about oils, or concentrates? Perfect! It’s fast, simple, and the taste is exceptional in virtually every way.

Heating with Automation

QuickDraw Vaporizer

The QuickDraw vaporizer allows for easy and automated temperature settings. You’ll be able to use a smart-heat option. What this option does is automatically adjust the temperature of your unit to the optimal setting for your herb, liquid or concentrate.

And the heating chamber is large, so you can store a decent amount of material in it with ease.

Fast is an understatement with this model; the unit goes from off to its highest heat setting in just 20 seconds.

Note: The automatic temperature setting is not for everyone. While I love this setting (maybe I like being a little lazy), some enthusiasts will not like the lack of control that is offered. Since you can’t truly choose a temperature setting of 410 degrees, for example, you do lose overall control of your vaporizer’s thickness.

[alert-warning]For me, during my testing, I found that the lack of precise controls just made it faster to switch from one material to the next.[/alert-warning]

But you can choose between three heat settings when using the herbal cartridge.

Vapor Quality

This is a smaller vaporizer, and the vapor quality for most portable models is lackluster – let’s be honest. But this model is different. QuickDraw has a very good / best in class vapor quality overall.

You will need to clean the unit thoroughly to ensure that the quality remains high, but this is something you will have to do with most vaporizers anyway.

If you’re trying to save money, please don’t leave your herb or concentrate in the chamber until your next session. Leaving the material in the chamber will produce a mediocre vapor the next time you turn on the unit.

So Easy Your Cat Can Use the QuickDraw

No, I’m not suggesting that your cat use this model. But I do want to note that there is just one button on this unit. You’ll be able to power the unit on by holding down the button for just three seconds.

And you’ll turn the unit off by following the same method.

The QuickDraw 500 DLX can also have the temperature changed by tapping the power button two times in succession. When this is done, you’ll notice the lights underneath the power button illuminate between one of three heat settings. I have only ever changed the temperature when using herbs, and this is what the manufacturer recommends.

Battery Life

The battery life is actually impressive for such a small unit. You’ll be able to use this unit on a single charge for the entire day, unless you vape a lot. The charger uses a magnetic snap rather than a USB cord, which makes it a breeze to charge.

You won’t have to go around trying to find your mini-USB – just snap and go.

Maintenance

Source: VapeWorld blog

I said it before and I will say it again: you need to maintain your vaporizer. A major upgrade over the company’s 300 model, the 500 DLX makes it a breeze to clean out the heating chamber and pack it as well.

I use a small brush to remove all of the chamber’s contents, and then I wipe it down thoroughly with a clean towel.

You’ll also need to clean the mouthpiece very well. The one downside that this model has is that it uses a plastic mouthpiece. Why does this matter? Plastic has a way of absorbing the taste of the vapor over time.

If you don’t clean it thoroughly and often, you’ll degrade the great vapor taste that you love.

In short, clean your mouthpiece often for best results.

Aside from this, you’ll just need to wipe down the exterior, and you’re good to go.

QuickDraw 500 Vs Pax

quickdraw-500-vs-pax

Pax is the king of portable vaporizers, and the QuickDraw is a very strong competitor. Is it better? Well, for the price and the overall function, I would say yes. The QuickDraw offers you 3-in-1 material potential as well as a price that is $75 cheaper than the Pax.

The Pax is also meant just for herbs.

I will be honest that I love all of the little modes that the Pax has to offer, and I think the design is just a little sturdier than the QuickDraw – very minor honestly – but with a lower price, I would always choose the QuickDraw.

The QuickDraw 500 vaporizer is simply the new king on the block for a quality, cheap portable vaporizer.  

Yes, you’ll lose some control of your unit’s temperature settings, but you will find that being able to switch between herb, concentrates and oils is a major benefit – especially for new users who don’t know what material they prefer.

You’ll also have the neat charging cable, long battery life and a vaporizer that is very stylish.

Plus, you’ll spend around $200 for this model – a steal by any means. Easy to operate, maintain and use, you’ll even notice that this model has a quick vaporize mode that allows for quick, on-the-go vaping when you need it most.


Click here to start enjoying the versatility that the QuickDraw 500 DLX vaporizer has to offer.

v10